Getting started with WebSocket API in ejabberd

The WebSocket API, as neatly explained by the MDN, is a technology that makes it possible to open a two-way interactive communication session between the user’s browser and a server. With WebSocket API, you can send messages to a server and receive event-driven responses without having to poll the server for a reply. In a sense it’s similar to XMPP or MQTT, but created with web applications in mind.
» Don’t want to configure WebSocket API yourself?
ProcessOne experts will make your business instantly connected. Contact us »
ejabberd and WebSocket API
WebSocket API listener is present in every latest version of ejabberd installation. If you followed my earlier tutorials, WebSocket API is available on the same port as the admin console, wss://example.com/5443/ws. Let’s see what we can do with it.
We begin with a ConverseJS quick start. ConverseJS is a very nice XMPP client for web browsers that supports BOSH and WebSocket API. Our aim is to set up a chat widget on our website, so visitors can instantly chat with us via a predefined login.
First, we add ConverseJS resources to the HTML page on which we want to have the chat widget, ideally in the <head> section:
<link rel="stylesheet" type="text/css" media="screen" href="https://cdn.conversejs.org/dist/converse.min.css">
<script src="https://cdn.conversejs.org/dist/converse.min.js" charset="utf-8"></script>
Then, we add the JavaScript code to initialize ConverseJS. Ideally just before the closing </body>:
<script>
    converse.initialize({
        bosh_service_url: 'https://example.com:5443/bosh', // Please use this connection manager only for testing purposes
        show_controlbox_by_default: true
    });
</script>
At this point, when we reload our HTML page we should see ConverseJS popup in the lower right corner. However, it asks for user login and doesn’t connect to our ejabberd server. We want an automatic login of a predefined user from our own server, joining a specified chat room. And we want to use WebSocket API instead of BOSH:
<script>
    converse.initialize({
        allow_logout: false,
        allow_muc_invitations: false,
        allow_contact_requests: false,

        authentication: 'login',
        auto_login: true,
        auto_reconnect: true,

        jid: 'www@example.com',
        password: 'pass123',

        websocket_url: 'wss://example.com:5443/ws/',
        auto_join_rooms: [
            'open@conference.example.com',
        ],
        notify_all_room_messages: [
            'open@conference.example.com',
        ],

        theme: 'concord',
        keepalive: true,
        hide_muc_server: true,
        play_sounds: true,
        singleton: true,
        show_client_info: false,
        show_controlbox_by_default: false,
        strict_plugin_dependencies: false
    });
</script>
In order for the above ConverseJS initialiser to work, you need to create a new ejabberd user, for example www@example.com with password pass123. There are other authentication methods described in the ConverseJS docs that enable secure ways to handle www user’s password.
To make the widget look more like a quick chat window instead of an IM messenger, you can paste the following CSS style right after the <script> initialiser section:
<style>
    #conversejs.converse-overlayed .chatbox.chatroom .box-flyout {
    max-width: 300px !important;
    max-height: 60vh !important;
        min-width: 0 !important;
        margin-left: 9rem !important;
    }

    #conversejs.converse-overlayed .chat-head {
        min-height: 0 !important;
        padding-bottom: 0 !important;
    }

    .occupants,
    .toggle-occupants,
  .chatbox-btn.close-chatbox-button,
    .chatbox-btn.show-room-details-modal {
        display: none !important;
    }
</style>
At this point, if you open the HTML page, a popup will appear asking just for the nickname and then connecting via WebSocket API straight to open@conference.example.com chat room. It will even keep the visitor connected to the chat room while they are browsing throughout the website, thanks to WebSocket API. Notice how we achieved all that without even touching ejabberd configuration file.
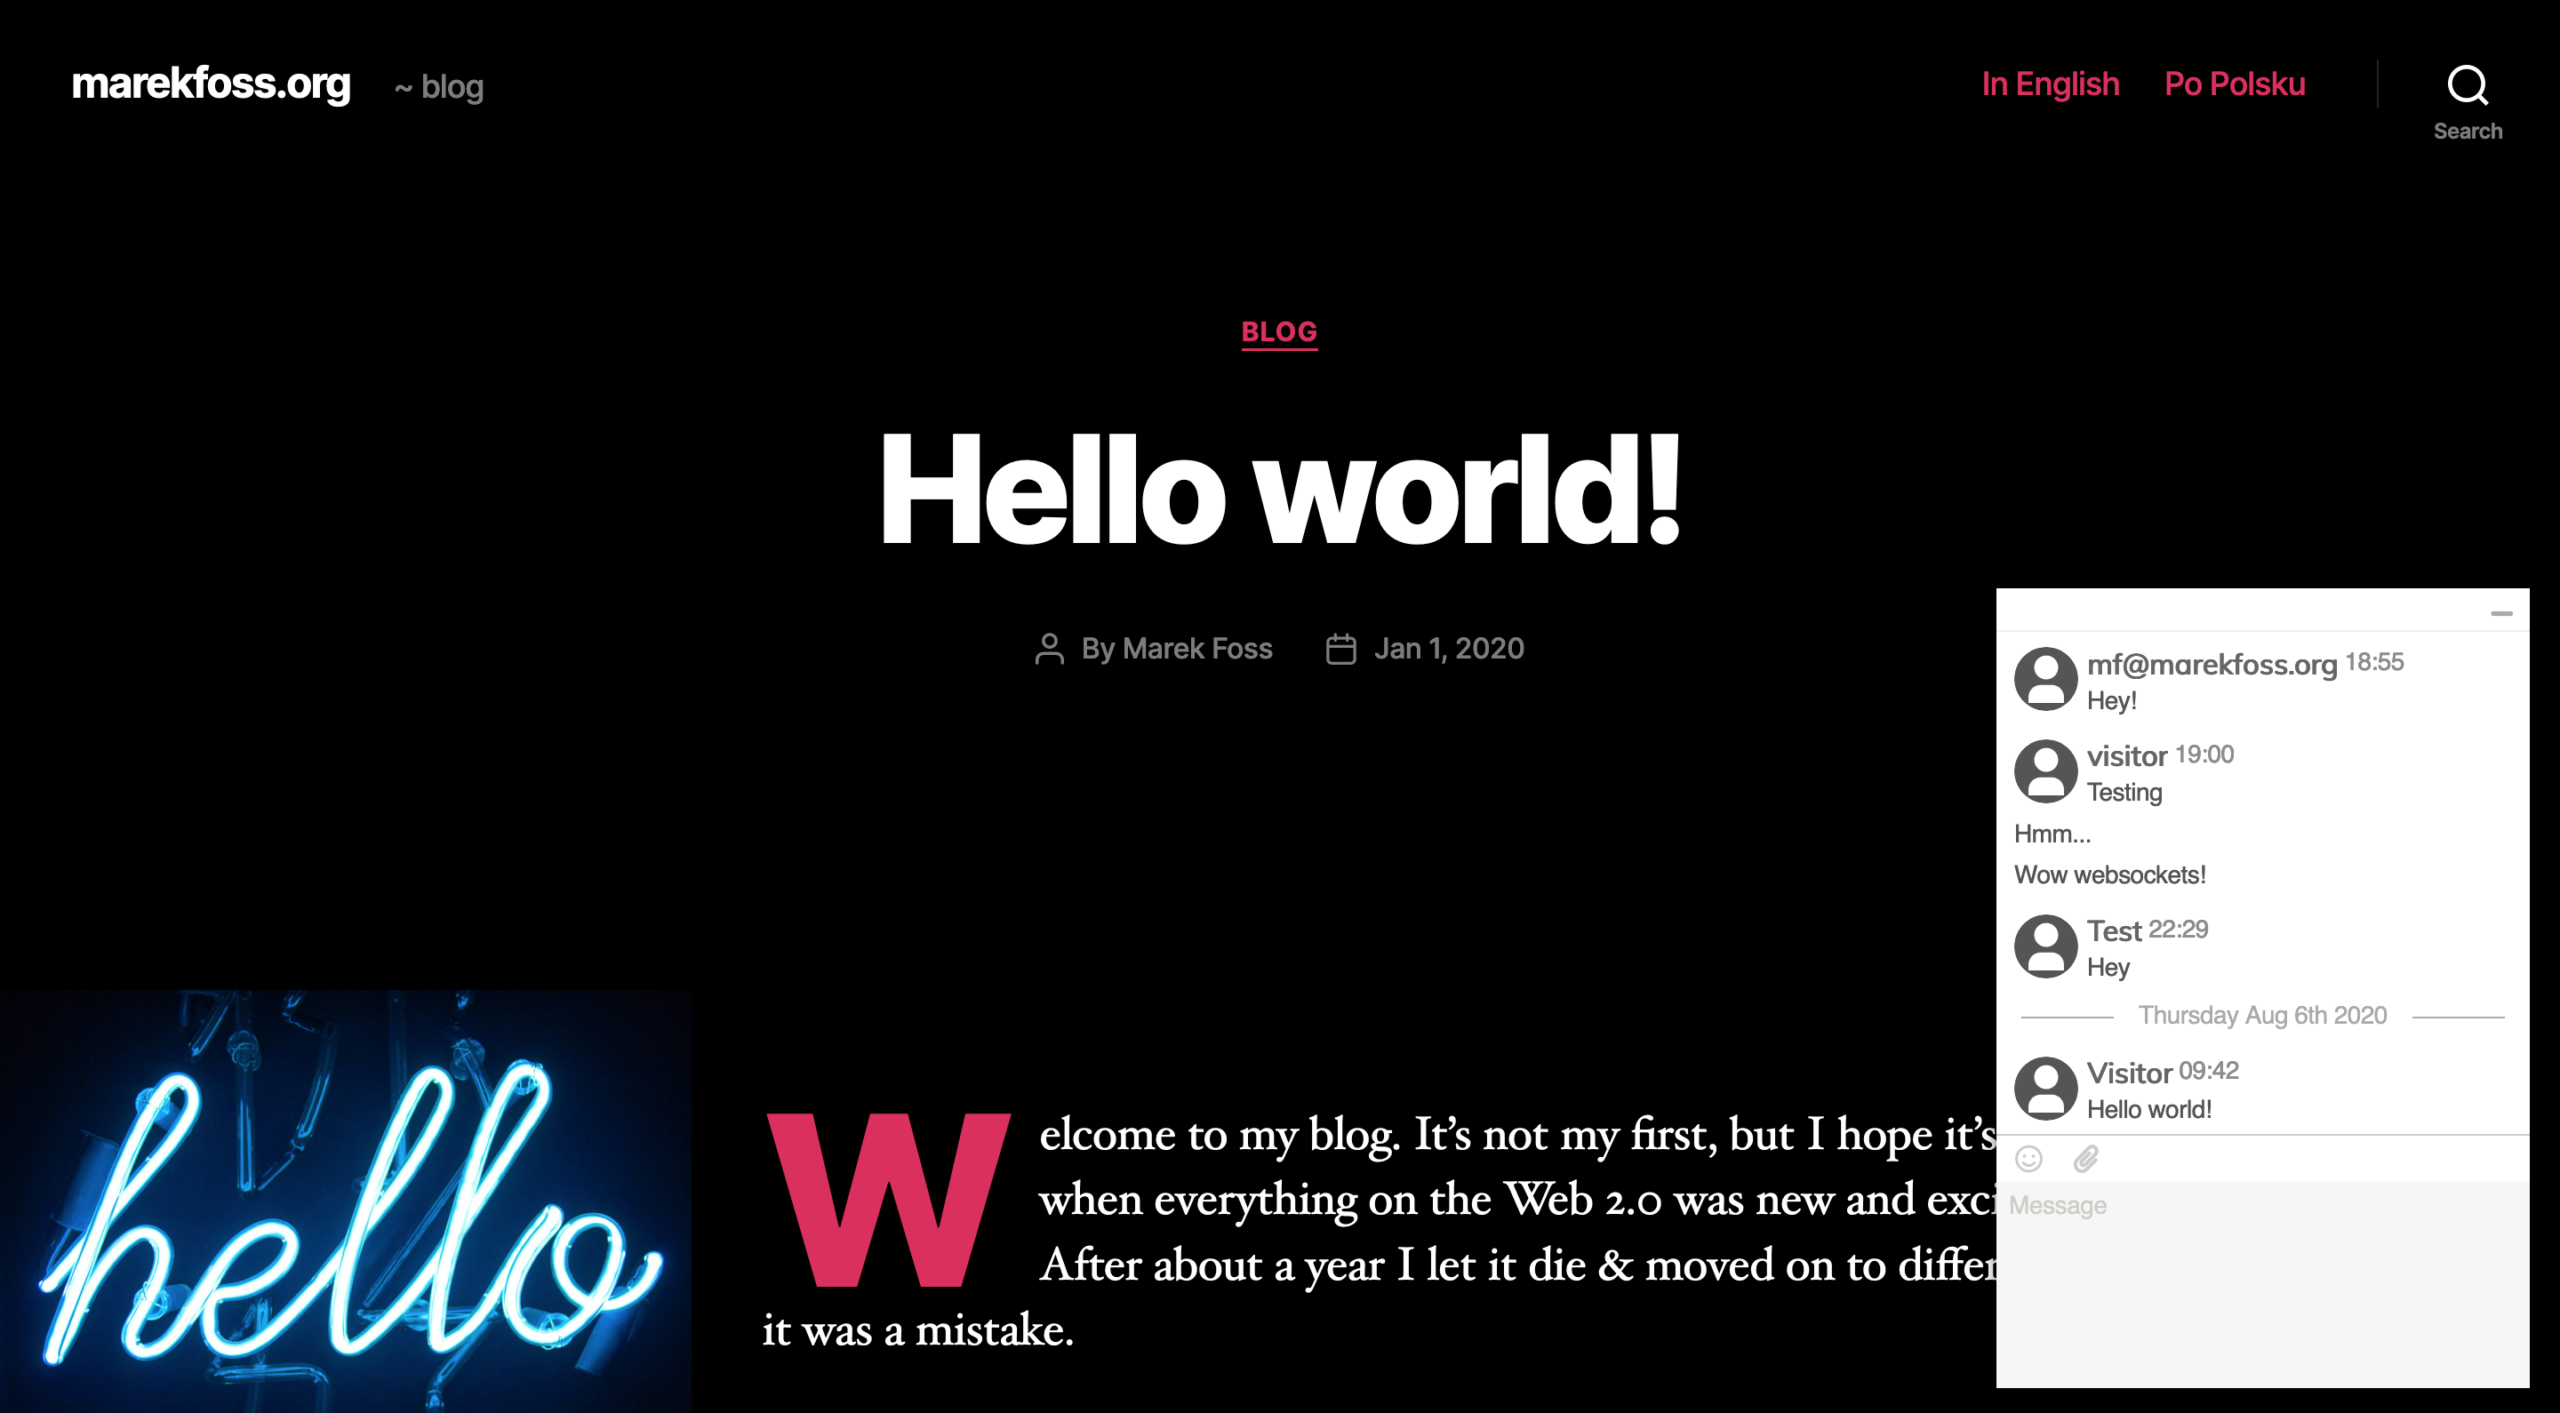
This WebSocket API demo is visible on my blog. Visitors can chat using the MUC room – with me and between each other.
In this ejabberd tutorial series:
- How to move the office to ejabberd XMPP server
- How to set up ejabberd video & voice calling (STUN/TURN)
- How to configure ejabberd to get 100% in XMPP compliance test
- Check ejabberd XMPP server useful configuration steps
- Starting with MQTT protocol and ejabberd MQTT broker
- Getting started with WebSocket API in ejabberd
- Install and configure MariaDB with ejabberd
- Publish-Subscribe pattern and PubSub in ejabberd
Photo by Paul Hanaoka on Unsplash
